Free Scrapbooking Patterns Layouts
still more photos and ideas from my personal collection
Free Scrapbooking Patterns Layouts - Come find out how I put together 3 layouts …well, it’s really hard to pick favorites but these are some of
them. So…grab a cup of java and enjoy these great layouts. You are
welcome to copy and paste the pics into your scrapbooking ideas file or
just print them out.
More Layouts 1 2 3 4 5 6 7 8 9 10 11 12 13 14 15 16 17 18 19 20 21 22 23 24 25 26 27 28 29 30 31 32 33
Free Scrapbooking Patterns Layouts 1
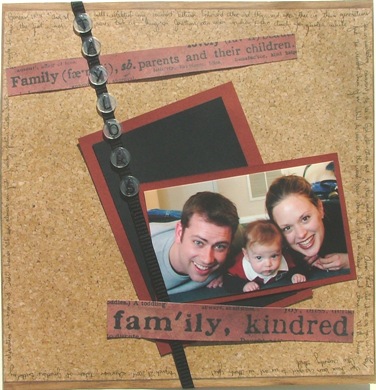
This one is
completely original and a little out of my normal comfort zone which
made it fun! The background looks like a cork bulletin board. I added
the double matted rectangles – one with the photo. The title blocks are a
piece of patterned paper… I just cut out the relevant words. Next, I
added a long black ribbon and attached clear alphabet bubbles spelling
out our last name. That’s it! Oh yeah, and I needed journaling, of
course, but I felt like a regular journaling block would take away from
the layout so I simply wrote around the edge of the background with a
black pen.


Free Scrapbooking Patterns Layouts 2
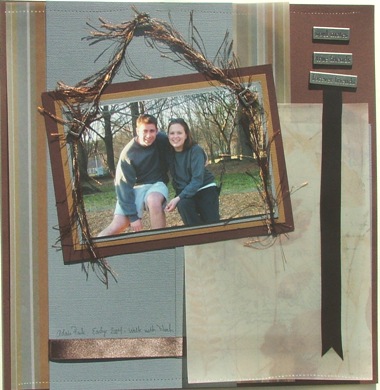
Another completely
original layout. I used burgundy cardstock for the background, then
layered the striped vellum, blue cardstock, and leaf print vellum in
that order. In the top right had corner I used metal accents from Making
Memories (I think?) – the words say soul mates, true friends, and
forever friends. Then I attached a satin ribbon behind the bottom accent
and let it hang over the leaf vellum. The horizontal burgundy stripe at
the bottom is also a piece of the same ribbon – it goes over the blue
cardstock then under the leaf vellum and stops right under the bottom of
the first piece of ribbon. I double matted the photo of my husband and
me and made it look like it was hanging with fiber and ribbon slides
from Making Memories (I think?) Last, I ran my sewing machine along the
top and bottom without any thread in it – great texture!


Free Scrapbooking Patterns Layouts 3
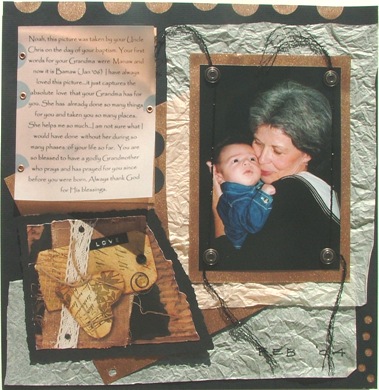
This one looks
more complex than it is. I started with a background of black cardstock
then layered crumpled off-white tissue paper and then metallic copper
paper on top of that. I punched a couple of holes in the metallic paper
(you’ll see those between the journaling and the photo). On the bottom
right hand corner I simply used a regular hole punch and adhered a small
piece of the metallic paper behind the holes. I used the same concept
on the top border but used ½ of my circle punch to form the notches. The
accent is a pre-printed tag matted with black cardstock. I matted the
photo on the metallic paper then used copper brads in the corners and
wrapped black fibers around those. Then, I mounted the whole thing on
the crumpled tissue paper. Last came the journaling (that always seems
to come last for me). I cut out a piece of the metallic paper and
notched it with my circle punch (again) and then added the journaling
printed on vellum. I attached the vellum with copper eyelets placed in
the center of the notches. Oh yeah, don’t forget the date at the bottom.
: ) I used another mini alphabet stamp set and black pigment ink.


More Free Scrapbooking Patterns Layouts


New! Comments
Have your say about what you just read! Leave me a comment in the box below.